notesbase
Vibe coded self-hosted notes app.
Why I built this
I wanted a shared notes app I could self-host without paying per seat or trusting someone else’s cloud with my data. Notion is great but everything lives on their servers. Obsidian is local-first but multi-user sync is a pain. notesbase is the middle ground: simple to run, actually multi-user, with client-side encryption built into the login flow.
| notesbase | Notion | Obsidian | |
|---|---|---|---|
Self-hosted |
✓ |
✗ |
✓ (local only) |
Multi-user |
✓ |
✓ (paid/seat) |
✗ |
Client-side encryption |
✓ |
✗ |
✗ |
Setup complexity |
|
SaaS |
Complex sync |
Open source |
✓ |
✗ |
✗ |
Features
-
Hierarchical pages with custom icons
-
Rich editor - headings, code blocks, tables, callouts, lists, file uploads, inline PDFs,
[[page mentions]] -
Tags & full-text search
-
Client-side AES-GCM encrypted pages (keyed to your account password, server never sees plaintext)
-
Multi-user with admin role; optional registration disable
-
File storage via S3/MinIO
-
Plugin API with scoped API keys (
pages:read,pages:write,tags:*,files:*)
Quick Start
git clone https://github.com/pljeske/notesbase
cd notesbase
cp .env.example .env
docker compose up
Open http://localhost:3000 and register. First account becomes admin.
Stack
-
Go (Gin, pgx, golang-migrate)
-
React + TypeScript + Vite + TipTap + Zustand
-
PostgreSQL
-
MinIO (S3-compatible)
-
Docker Compose / Helm
Plugin API
Create an API key in Settings, then authenticate with Authorization: Bearer nbp_<key>.
# List pages
curl -H "Authorization: Bearer nbp_..." http://localhost:8080/api/v1/plugin/pages

# Create a page
curl -X POST -H "Authorization: Bearer nbp_..." \
     -H "Content-Type: application/json" \
     -d '{"title":"My page","content":{}}' \
     http://localhost:8080/api/v1/plugin/pages
Available scopes: pages:read, pages:write, tags:read, tags:write, files:read, files:write.
Encrypted pages are read-only via the API (the server never holds the key).
User Guide
A self-hosted notes application with rich text editing, hierarchical pages, tags, encryption, and file uploads.
.1. Getting Started
.1.1. Creating an Account
Navigate to the Notesbase URL and click Sign up on the login page. The first user to register automatically becomes an administrator. Subsequent registrations create regular user accounts.
| Registration may be disabled by your administrator. Contact them if you cannot access the sign-up page. |
.2. Pages
.2.1. Creating Pages
Use the + button at the top of the sidebar to create a new root-level page. To create a subpage nested under an existing page, open that page’s context menu (⋯) and choose Add subpage.
.2.2. Page Tree
All pages are displayed as a collapsible hierarchy in the sidebar. Click the chevron icon (►) next to a page to expand or collapse its children. The currently active page is highlighted.
Pages with encryption enabled display a lock icon (🔒) next to their title.
.2.3. Reordering Pages
Click and hold the drag handle (⠿, the six-dot icon) to the left of a page title, then drag it to a new position. Reordering is supported within the same parent level.
.2.4. Context Menu
Hover over any page in the sidebar and click ⋯ to open its context menu. Available actions:
| Action | Description |
|---|---|
Add subpage |
Creates a new child page nested under this one. |
Duplicate |
Creates a copy of the page (not nested under the original). |
Move to Trash |
Soft-deletes the page; it can be restored from the Trash section. |
.3. Editing Content
.3.1. The Editor
Click into the content area below the page title to begin writing. The editor auto-saves your changes with a short delay after you stop typing. The current save state is shown in the header:
-
Saving… — a save is in progress
-
Saved — the last save was successful
-
Save failed — an error occurred; check your connection
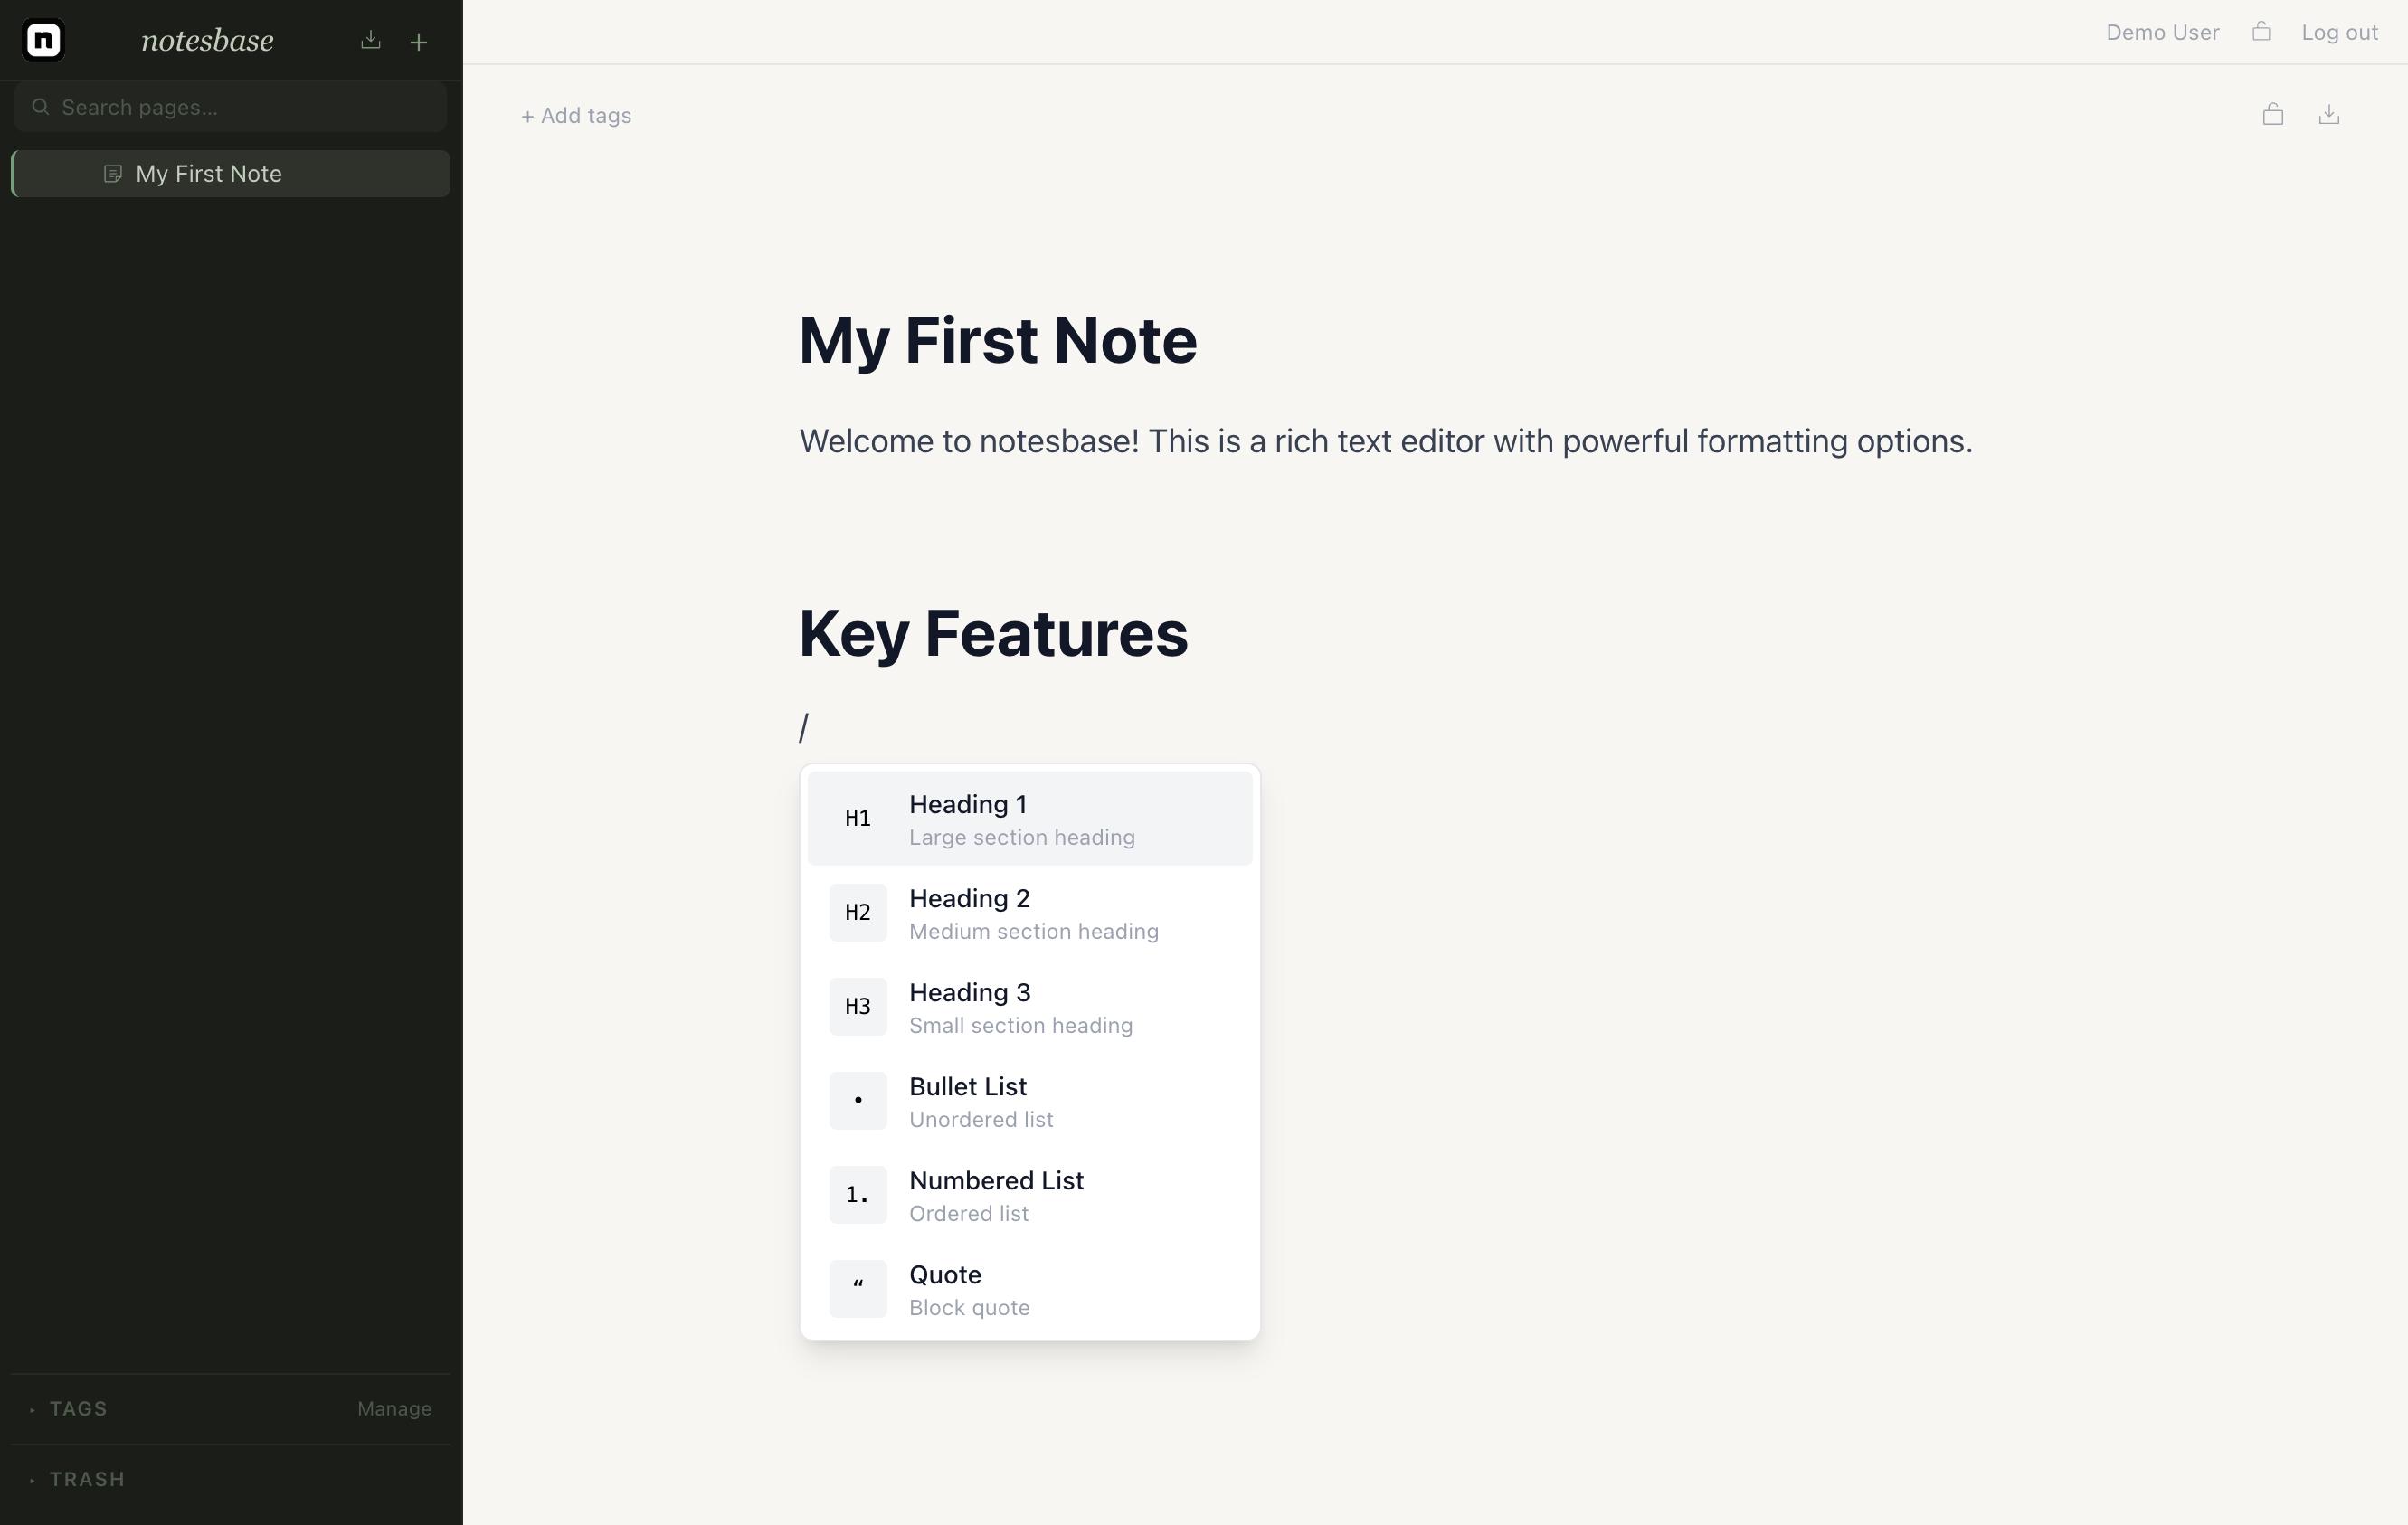
.3.2. Slash Commands
Type / anywhere in the editor to open the block insertion menu.
Type to filter the list, then click or press Enter to insert a block.
| Block | Description |
|---|---|
Heading 1 / 2 / 3 |
Section headings at three levels. |
Bullet list |
Unordered list items. |
Numbered list |
Ordered (numbered) list items. |
Blockquote |
Indented quotation block. |
Code block |
Syntax-highlighted code (see Code Blocks). |
Table |
3×3 table (see Tables). |
Divider |
Horizontal rule separating content sections. |
Image |
Upload an image from your device (see Images). |
Upload a PDF for inline preview (see PDFs). |
|
File |
Upload any file as a downloadable attachment (see Files). |
Info / Warning / Tip callout |
Highlighted callout block for notices and tips. |
Page mention |
Inline link to another page (see Page Mentions). |
.3.3. Text Formatting
Select any text to reveal the formatting toolbar. Available options:
| Format | Shortcut |
|---|---|
Bold |
Ctrl+B / ⌘+B |
Italic |
Ctrl+I / ⌘+I |
Underline |
Ctrl+U / ⌘+U |
Strikethrough |
— |
Inline code |
— |
Link |
Paste a URL or click the link icon to enter one |
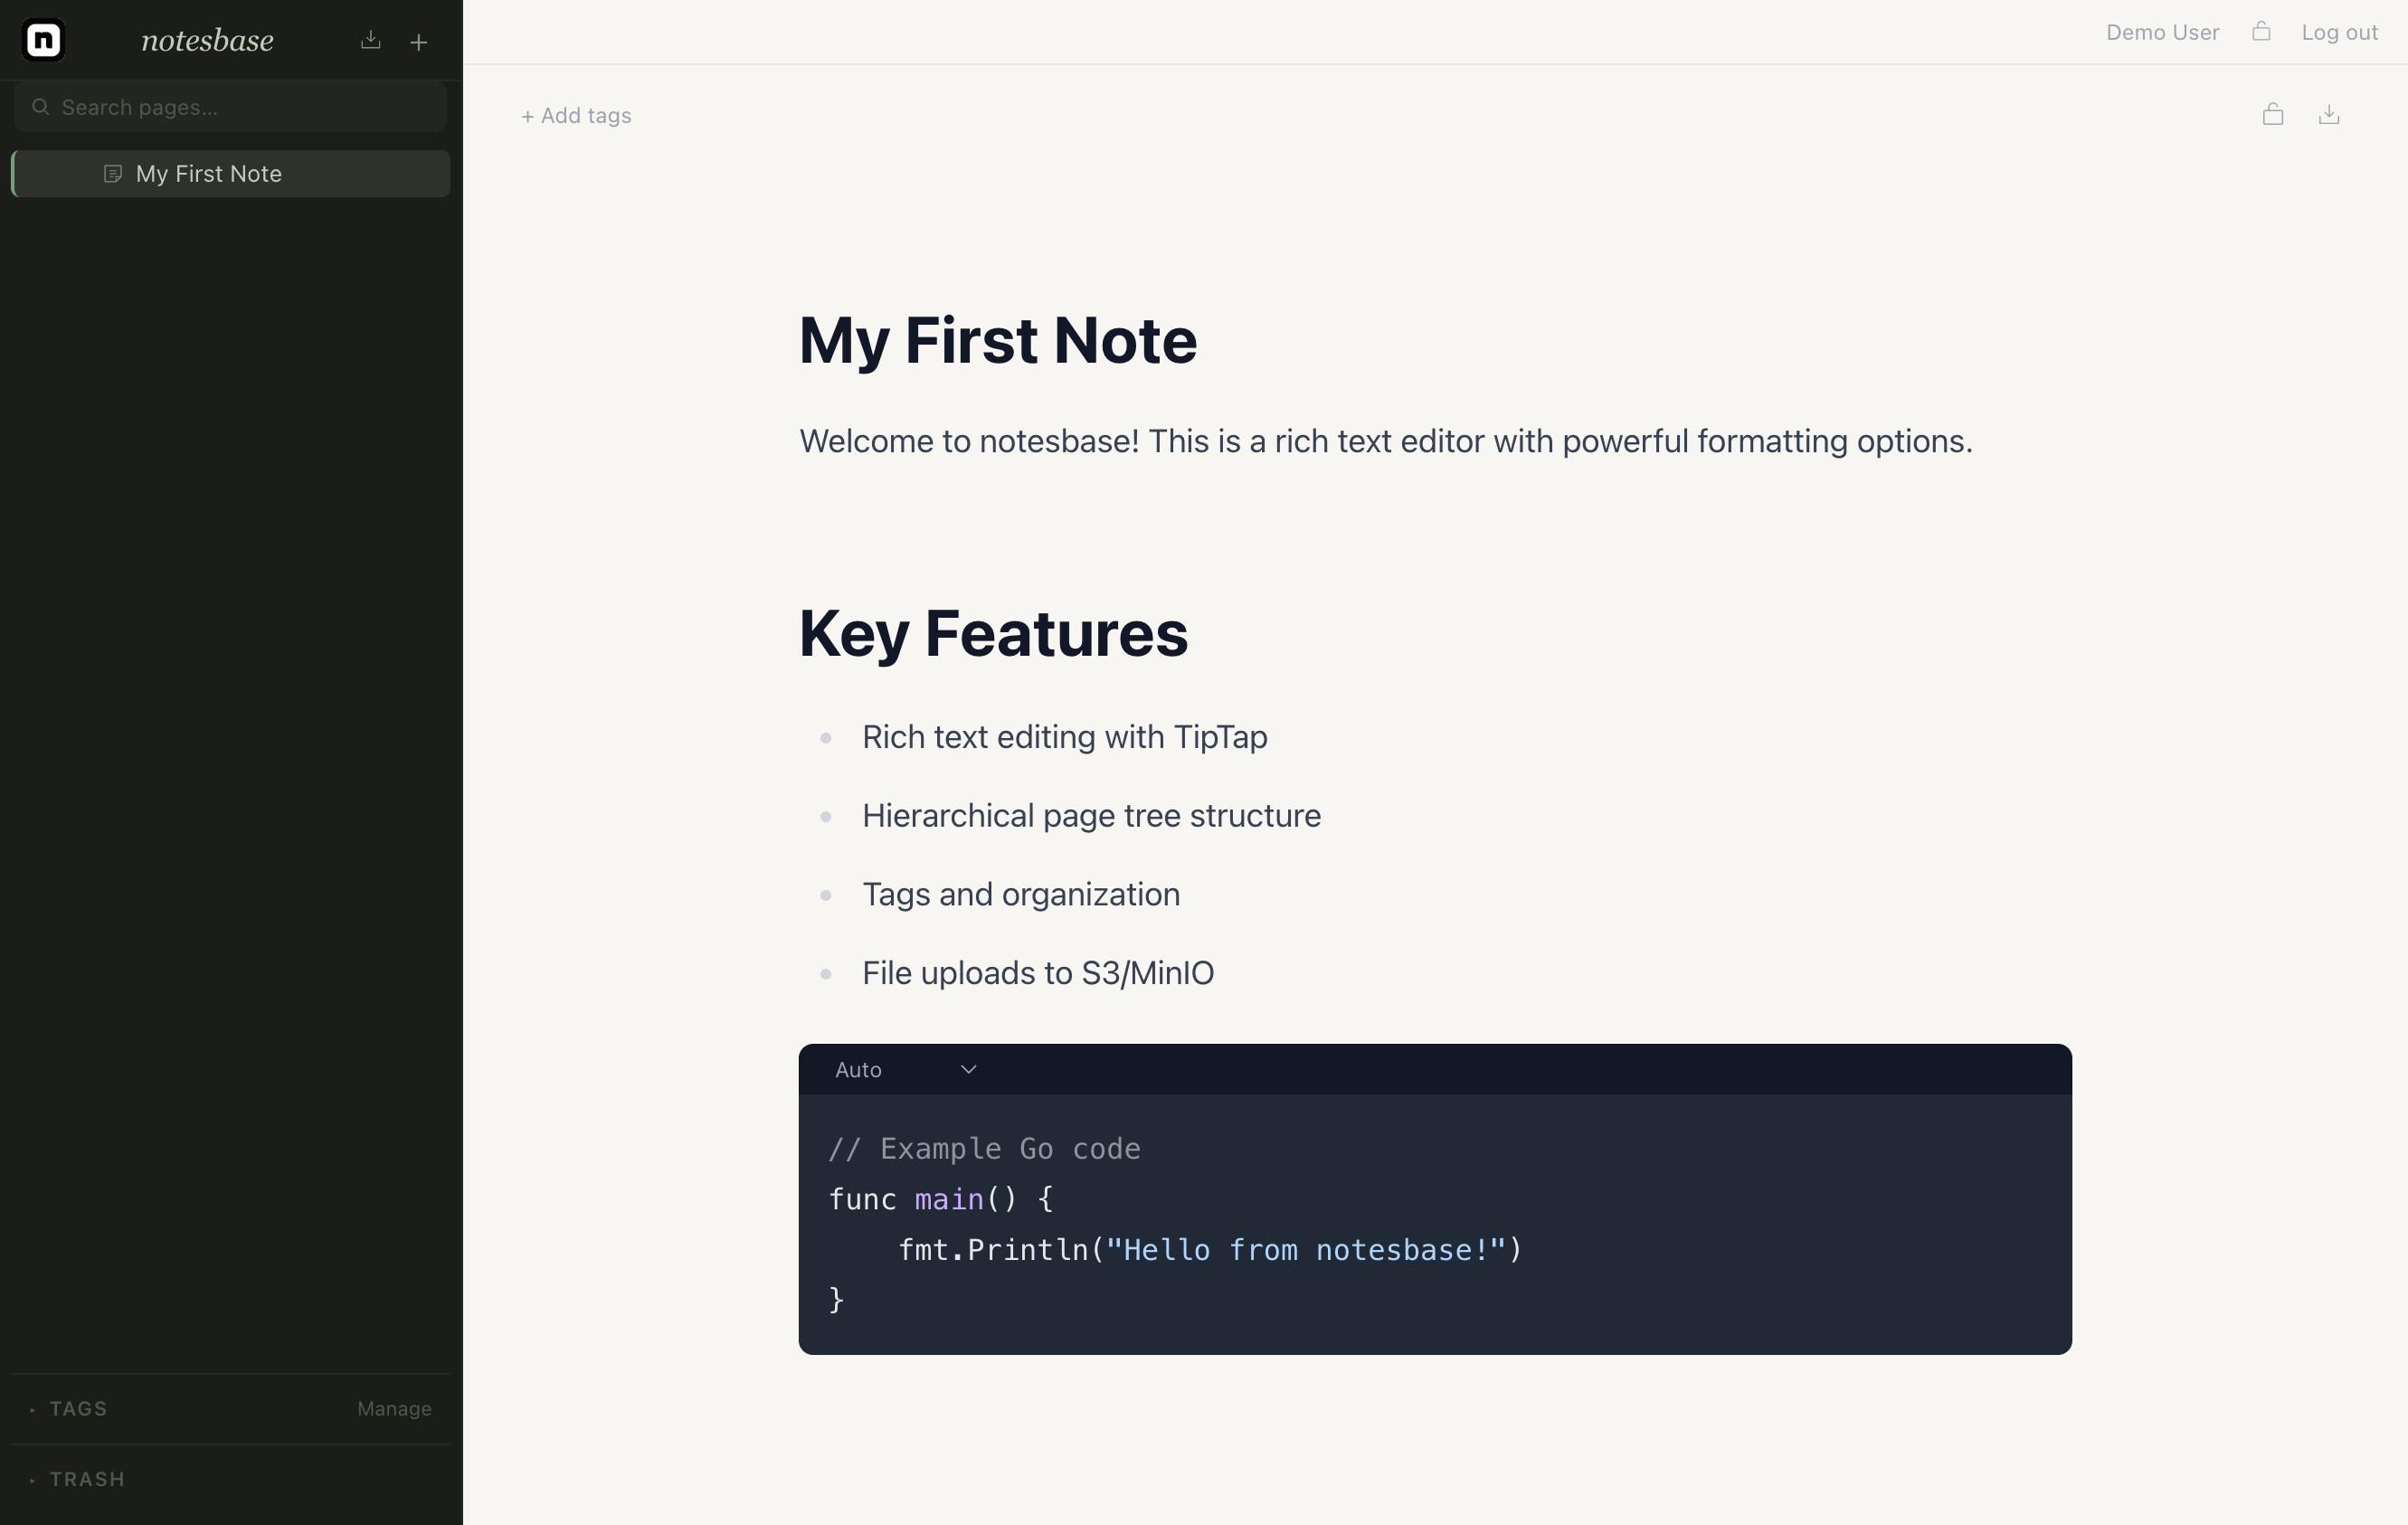
.3.4. Code Blocks
Insert a code block via /code.
Click the language label at the top-right of the block to select from 24+ supported languages including Python, JavaScript, TypeScript, Go, Rust, Java, C++, SQL, and more.
Syntax highlighting is applied automatically.
.3.5. Tables
Insert a table via /table.
A 3×3 grid is created by default.
Right-click a cell or use the table toolbar to:
-
Add or remove rows and columns
-
Delete the table
.3.6. Images
Images can be added in three ways:
-
Type
/imageand upload a file from your device -
Drag an image file from your file manager and drop it into the editor
-
Paste an image from your clipboard (Ctrl+V / ⌘+V)
After inserting an image, drag the resize handles on its edges to adjust its dimensions.
.4. Page Mentions and Backlinks
.4.1. Page Mentions
Type [[ anywhere in the editor to open the page mention autocomplete.
Start typing the page title to filter results, then click or press Enter to insert the link.
The mention appears as an inline chip with the page title.
Mentioning a page automatically creates a backlink in the target page.
.5. Tags
.5.1. Adding Tags to a Page
Click the tag icon in the page toolbar (top-right area) to open the tag picker. Check the boxes next to tags you want to assign. Tags are shown as coloured badges below the page title.
.5.2. Creating Tags
In the tag picker, type a new tag name in the search field and click Create tag. A color is assigned automatically; you can change it later.
.6. Search
Click the search bar at the top of the sidebar or press / to focus it. Results appear as you type (with a short debounce delay).
Use ↑ and ↓ to navigate results, Enter to open the selected page, and Escape to close.
| Encrypted pages are excluded from search results. |
.7. Encryption
.7.1. Encrypting a Page
Click the lock icon in the page toolbar to toggle encryption. Once enabled, the page content is encrypted using your account password. A badge reading Encrypted · not searchable appears in the toolbar.
.8. Trash
.8.1. Moving Pages to Trash
Open a page’s context menu in the sidebar and choose Move to Trash. The page is soft-deleted and no longer appears in the main tree.
.9. Export
.9.1. Exporting a Single Page
Click the export icon in the page toolbar to open the export dialog. Choose a format and download the file.
.10. API Keys
Navigate to Settings → API Keys to manage programmatic access.
.10.1. Creating a Key
-
Click Create API key.
-
Enter a descriptive name.
-
Select the scopes (permissions) the key should have.
-
Click Create.
| Copy the secret key immediately after creation — it is shown only once. |
.11. Admin Panel
The Admin Panel is accessible from the header for administrator accounts only.
.11.1. User Management
The Users table lists all registered accounts with their name, email, role, and status.
| Action | Description |
|---|---|
Change role |
Use the dropdown to promote a user to admin or demote to user. You cannot change your own role. |
Disable / Enable |
Prevent a user from logging in without deleting their account. |
.12. Keyboard Shortcuts
| Shortcut | Action |
|---|---|
/ |
Open slash command menu in the editor |
\[\[ |
Open page mention autocomplete |
Ctrl+B / ⌘+B |
Bold |
Ctrl+I / ⌘+I |
Italic |
Ctrl+U / ⌘+U |
Underline |
Ctrl+V / ⌘+V |
Paste (images paste directly into the editor) |
↑ / ↓ |
Navigate search or slash command results |
Enter |
Confirm selected search result or slash command |
Escape |
Close search, slash command menu, or modals |